


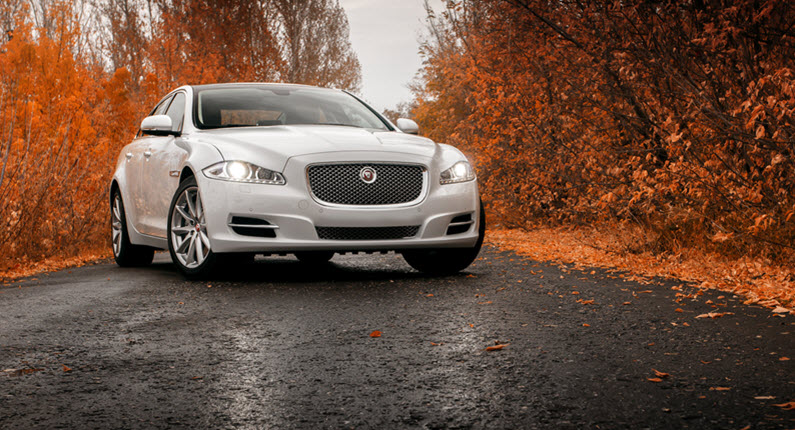
If you are hearing a mysterious rattling noise from your Jaguar engine, this problem might be caused by tensioner failures in your model’s timing chain system. To fully grasp the gravity of this issue, let’s first understand what a timing chain is and the crucial role the tensioner plays in your Jaguar’s engine.
In your Jaguar’s engine, the timing chain is responsible for the rotation in the crankshaft and camshaft. This synchronization helps to ensure that the engine’s valves are opened and closed at the right moments to allow for optimal combustion and performance.
The Role of the Tensioner
Now, let us talk about the timing chain tensioner. This is a small component that plays a pivotal role in maintaining the appropriate tension within the timing chain. The tensioner consists of a piston that exerts pressure on the timing chain, keeping it taut and preventing any unnecessary slack. This precision is crucial because any excess play in the timing chain can lead to misalignment, impacting the engine’s performance and potentially causing catastrophic damage.
How to Spot Tensioner Failure
Identifying a failing timing chain tensioner early on can save you from extensive damage to your engine. Keep an attentive ear and eye out for these telltale signs:
- Rattling Noises: When you hear a distinct rattle or clatter from your engine, especially during startup, it’s often a red flag for a failing or loose tensioner. This noise arises due to the increased slack or improper tension in the timing chain caused by the tensioner’s inability to maintain the required tension level.
- Engine Performance Issues: A poorly functioning timing chain tensioner can significantly impact your Jaguar’s performance. Reduced engine performance, such as sluggish acceleration or difficulties starting the car, can stem from a compromised timing chain. When the tensioner fails to maintain proper tension, the timing chain may slip or skip teeth on the sprockets, affecting the engine’s timing. This, in turn, leads to suboptimal combustion, resulting in decreased power and responsiveness.
The Most Common Reasons of a Tensioner Problem
Natural Breakdown
The tensioner comprises various moving parts, including springs and a hydraulic mechanism, all subject to wear during engine operation. Over time, this wear and tear can lead to decreased tensioning ability, ultimately resulting in diminished performance and eventual failure.
Lack of Maintenance
Regular maintenance, particularly timely oil changes, is crucial for the health of the tensioner. Engine oil acts as a lubricant, keeping the tensioner’s components working smoothly. However, neglecting oil changes can cause oil sludge buildup, impeding the tensioner’s functionality. This buildup increases friction and hampers the tensioner’s ability to operate optimally, leading to potential malfunction.
The Solutions and Remedies
When facing potential timing chain tensioner issues in your Jaguar, swift action is key to preventing further damage. Here are a few steps to address the problem:
Regular Maintenance: Adhere to your Jaguar’s recommended maintenance schedule, ensuring timely oil changes and inspections by certified technicians. This simple yet crucial step can significantly prolong the lifespan of your timing chain tensioner.
Professional Diagnosis: At the first sign of trouble, consult a qualified mechanic or Jaguar specialist to diagnose the issue accurately. They can conduct thorough inspections using specialized tools to pinpoint the tensioner’s exact problem.
Tensioner Replacement: If diagnosed with a faulty tensioner, replacing it promptly is crucial. Opt for genuine Jaguar parts or high-quality aftermarket alternatives recommended by professionals to ensure optimal performance and longevity.
Your Premier Destination for Jaguar Timing Chain Tensioner Maintenance
If you find yourself facing unsettling rattle or any other signs of timing chain tensioner issues, worry not. At Encore Motorcars

we stand as your beacon of expertise and reliability. Our workshop is armed with ASE-certified technicians who have the skill to diagnose and address any tensioner issues in your Jaguar. With state-of-the-art tools & equipment at our disposal, we’re equipped to restore your vehicle’s timing chain tensioner to optimal functionality, ensuring your Jaguar continues to command attention on the roads.
We are conveniently situated in Sarasota, FL, and our service extends to drivers from neighboring cities, including Bradenton, Ellenton, Nokomis, Osprey, Parrish, Venice, Lakewood Ranch, Longboat Key, Siesta Key, and University Park. When you entrust your Jaguar to us, rest assured that we will deliver excellent services. So, don’t hesitate to reach out. Call us now.
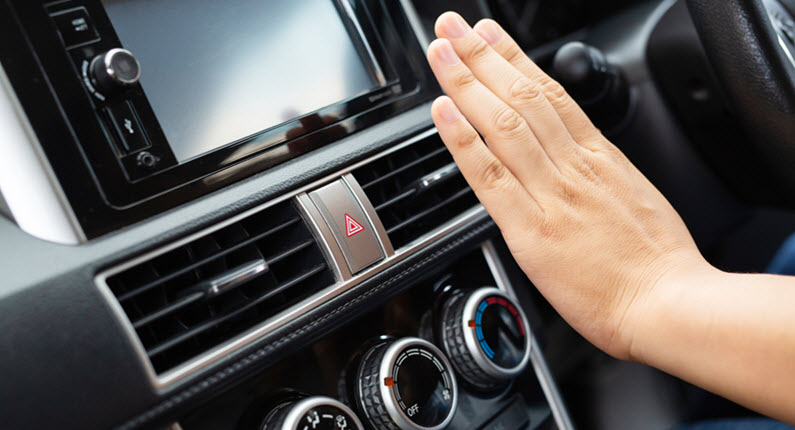
Owning a BMW is the epitome of automotive luxury and performance. However, even these precision-engineered vehicles encounter their share of issues. One common problem that BMW owners may face is HVAC blower failure, which disrupts the comfort and functionality of the vehicle’s heating and cooling systems. Understanding the causes, troubleshooting methods, and potential solutions for this intricate issue is crucial for BMW enthusiasts looking to maintain your cars’ optimal performance and comfort.
Understanding HVAC Blower Failure in BMWs
When it comes to BMWs, the HVAC (Heating, Ventilation, and Air Conditioning) system is a sophisticated setup designed to offer supreme comfort to drivers and passengers. However, despite the meticulous engineering, issues can arise, particularly with the HVAC blower. This vital component is responsible for the circulation and regulation of air within the vehicle. Identifying the signs and potential causes of HVAC blower failure is essential for maintaining optimal functionality.
HVAC blower failure in BMWs can manifest in multifaceted ways, often catching owners off guard. Among the prominent indicators are instances where the blower completely fails to operate, leaving the interior devoid of any airflow. It might also exhibit intermittent behavior, working sporadically or only functioning at specific times, causing inconvenience and discomfort. During operation, unusual noises like rattling, grinding, or squealing might emanate from the blower unit, signaling an underlying issue.
A confluence of factors can lead to HVAC blower malfunction in BMWs. The primary culprits include a failing blower motor, issues with the final stage resistor (FSR), or electrical anomalies within the system. The blower motor, entrusted with the crucial task of circulating air throughout the HVAC network, is prone to succumbing to wear and tear over time. Continuous usage and exposure to varying temperatures can degrade its performance, eventually resulting in reduced efficiency or complete cessation.
Diagnosing HVAC blower failure often necessitates a systematic approach. Begin by inspecting the blower motor for visible signs of wear, like excessive noise, reduced airflow, or physical damage. Testing the electrical connections, including fuses and relays related to the HVAC system, is imperative to identify any underlying issues that could disrupt the blower’s performance.
Understanding these potential causes and manifestations of HVAC blower failure empowers BMW owners to take proactive measures to maintain their vehicle’s HVAC system. Addressing these issues promptly through professional diagnostics and repair services ensures the seamless operation of the HVAC system, preserving the luxury driving experience BMWs are renowned for.
Troubleshooting and Solutions
When facing HVAC blower issues in your BMW, a systematic approach to troubleshooting can help pinpoint the root cause. Start by checking the fuses related to the HVAC system; a blown fuse could be a simple reason for the malfunction. Inspecting the blower motor itself for signs of damage or wear, such as excessive noise or limited airflow, can indicate the need for replacement.
The FSR (final stage resistor), often a culprit in blower-related problems, can be tested using diagnostic tools to assess its functionality accurately. A failing FSR may lead to inconsistent blower operation or the blower not functioning at certain speed settings. Replacing this component can often resolve these issues, restoring the HVAC system’s normal functionality.
Additionally, a thorough examination of the electrical connections and wiring associated with the blower system is crucial. Loose connections or damaged wiring can impede the blower’s performance and need to be addressed promptly to ensure proper operation.
Seeking Professional Assistance and Encore Motorcars’ Expertise

While some BMW enthusiasts might opt for a DIY approach, BMW Blower Motor Checkseeking professional assistance from certified technicians is advisable for complex HVAC blower failures. Encore Motorcars specializes in servicing luxury vehicles like BMWs. We possess the expertise, tools, and genuine replacement parts necessary to resolve intricate issues like HVAC blower failures.
Encore Motorcars stands out among automotive service providers in Bradenton, Ellenton, Nokomis, Osprey, Parrish, Venice, Lakewood Ranch, Longboat Key, Siesta Key, University Park, and Sarasota, FL. Our team of skilled technicians is well-versed in diagnosing and fixing various BMW issues, ensuring top-notch repairs and maintenance. With our commitment to excellence and customer satisfaction, Encore Motorcars delivers premium service, keeping your BMW running at its best.
Experience unparalleled service for your BMW with Encore Motorcars. For expert BMW servicing and solutions for HVAC blower failure, contact us today at 941-922-6337 to ensure your BMW is running at its finest.
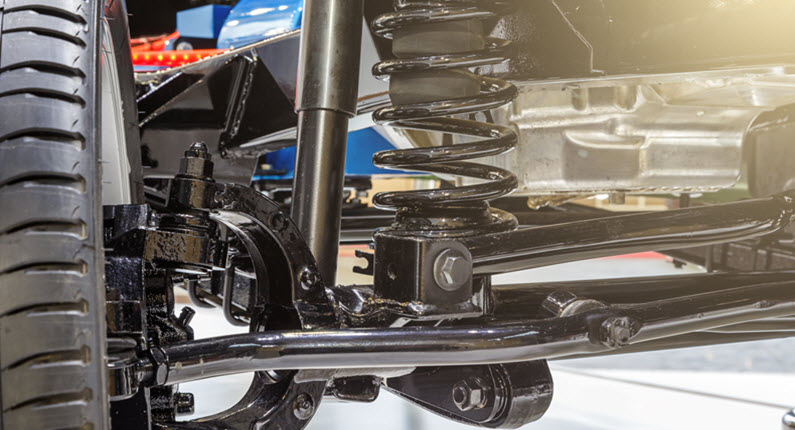
Dealing with Land Rover’s failed suspension struts can be a challenging endeavor, but it’s a challenge worth taking on to ensure your Land Rover’s optimal performance and safety. You want to prevent your Land Rover’s suspension struts from becoming the weakest link. These struts play a major role in the suspension system of Land Rovers. They serve multiple functions that contribute to your SUV’s overall performance and ride quality. Let’s take a deeper look below.
Absorbing Shock
One of the primary functions of suspension struts is to absorb and dampen the shock and impact from road imperfections, such as potholes, bumps, and rough surfaces. As your SUV travels over uneven terrain, the struts compress and extend to cushion the ride. This absorption of shock helps provide a smoother and more comfortable ride for both the driver and passengers.
Without properly functioning struts, your SUV would transmit these shocks directly to the chassis and occupants, resulting in a rough and uncomfortable experience.
Maintaining Traction
Suspension struts are crucial in maintaining tire contact with the road surface. When driving, your tires need to remain in constant contact with the road to ensure optimal traction. This is essential for stability, control, and safety. The struts help control the vertical motion of the wheels, preventing them from bouncing excessively.
When struts fail or become worn out, they may no longer adequately support the vehicle’s weight, leading to issues that we’ll discuss below.
How To Know When You Have Failed Suspension Struts
Tipping While Turning
When you notice your Land Rover leaning excessively to one side while turning, especially during sharp corners or maneuvers, it’s a clear sign of suspension strut issues. Failed struts can result in poor lateral stability, making your SUV feel unbalanced.
Diving Front End While Braking
When you apply the brakes and your Land Rover’s front end noticeably dips, it’s a sign of weakened or failed struts. Suspension struts help control weight transfer during braking, and when they’re not functioning correctly, the front end can plunge downward, compromising safety and comfort.
Uneven Tire Wear
One of the more subtle indicators of failed suspension struts is uneven tire wear. Failed struts can lead to irregular contact between the tires and the road, causing the tires to wear unevenly. This can be seen as differences in tread depth across the tire’s surface. If you notice uneven tire wear, it’s a good idea to have your suspension system inspected.
Unusual Bouncing
A clear sign of suspension strut issues is a bouncy or unsettled ride. If your Land Rover feels excessively bouncy, especially over uneven or rough terrain, the struts may not be effectively dampening the shocks from the road.
Addressing Suspension Struts Issue
- Inspection: The first step is to have your Land Rover inspected by a qualified mechanic or technician who specializes in suspension systems. They will perform a thorough examination of your struts, looking for signs of wear, damage, or failure. This inspection will help you accurately assess the condition of your suspension struts.
- Replacement: If the inspection confirms that your suspension struts are failing, it’s advisable to replace them promptly. Depending on your preferences and budget, you can opt for high-quality aftermarket struts or genuine Land Rover parts. High-quality components often offer better durability and improved performance, ensuring a smoother and more controlled ride.
- Regular Maintenance: To prevent future suspension strut issues, follow the manufacturer’s recommended maintenance schedule for your Land Rover. Regular checks and maintenance tasks, such as lubrication and part replacements, as necessary, can extend the lifespan of your suspension components and help you avoid potential problems in the future.
Restore Your Land Rover’s Smooth Rides With Quality Suspension Struts Repairs

At Encore Motorcars, we are the leading full-service dealership in Sarasota, FL. Our team of ASE-certified mechanics is dedicated to providing you with a hassle-free experience when diagnosing and fixing suspension strut issues. And to make your experience even more convenient, we offer a free courtesy car wash with our services.
Located in Sarasota, we proudly serve customers from Bradenton, Ellenton, Nokomis, Osprey, Parrish, Venice, Lakewood Ranch, Longboat Key, Siesta Key, and University Park. Give us a call now, and let us get your Land Rover back on the road.

In the intricate world of automotive engineering, where precision and efficiency are paramount, it’s essential to pay attention to every component, no matter how small it may seem. One such component that often goes unnoticed but plays a pivotal role in the performance and longevity of Land Rover cars is the PCV (Positive Crankcase Ventilation) valve. This seemingly unremarkable part serves a crucial purpose in maintaining the overall health of your Land Rover’s engine.
What is a PCV Valve?
Let’s start by unraveling the mystery of the PCV valve. PCV stands for Positive Crankcase Ventilation, and the PCV valve is a small yet integral component of your Land Rover’s engine system. Its primary role is to regulate the flow of gases between the crankcase, where engine oil resides, and the intake manifold. This seemingly simple function serves a multitude of purposes.
The PCV valve ensures that harmful gases, such as blow-by gases and moisture, are effectively removed from the engine’s crankcase. By facilitating this process, the PCV valve helps maintain a balanced environment within the engine, preventing the accumulation of pressure and harmful contaminants.
How to Identify PCV Valve Issues
Identifying PCV valve issues requires vigilance. Some common symptoms of a failing PCV valve include:
- Rough idling
- Decreased fuel efficiency
- Oil leaks
- Increased exhaust emissions.
- In some instances, a malfunctioning PCV valve may trigger the check engine light on your Land Rover’s dashboard.
To stay ahead of potential problems, it’s advisable to include PCV valve inspections as part of your routine maintenance schedule. Consult your Land Rover’s manual or seek guidance from a qualified technician to determine the correct replacement interval for your specific make and model.
The Risks of a Faulty PCV Valve
Now, let’s delve into the potential pain points associated with a malfunctioning PCV valve. When this unassuming component fails to perform its duties correctly, it disrupts the delicate equilibrium of gases within the engine. This disruption can lead to a domino effect of issues within your Land Rover.
First and foremost, a faulty PCV valve can result in increased pressure within the crankcase. This pressure buildup can manifest as oil leaks, which not only create a mess but also compromise engine efficiency. Over time, this can lead to more severe engine damage, translating into significant repair costs.
Furthermore, a malfunctioning PCV valve can affect your Land Rover’s emissions. Increased emissions could potentially lead to environmental concerns and even regulatory issues, depending on local emissions standards and regulations. It’s evident that the stakes are high when it comes to the PCV valve’s proper functioning.
Reap the Benefits of a Timely Replacement
Given the potential risks associated with a faulty PCV valve, timely replacement becomes paramount. Fortunately, there are significant advantages to embracing this proactive approach. Replacing your Land Rover’s PCV valve when necessary or as part of routine maintenance offers numerous benefits. Chief among them is the preservation of your engine’s health and longevity. A properly functioning PCV valve ensures efficient removal of contaminants from the engine, reducing wear and tear.
Additionally, an optimally functioning PCV valve helps maintain the Land Rover’s fuel efficiency, which is not only advantageous for your wallet but also for the environment. By addressing PCV valve issues promptly, you can prevent costly engine repairs down the road, ultimately saving you time and money.
Contact Us For Skilled Land Rover Repairs

The PCV valve is a small yet mighty component within your Land Rover’s engine system. Its role in maintaining engine health, fuel efficiency, and emissions cannot be overstated. Recognizing the signs of a failing PCV valve and addressing the issue promptly is key to preserving your Land Rover’s performance and longevity.
At Encore Motorcars, we specialize in Land Rover maintenance and are here to assist you with any PCV valve concerns. Contact us today for expert guidance and assistance in ensuring that your Land Rover continues to conquer the roads of Bradenton, Ellenton, Nokomis, Osprey, Parrish, Venice, Lakewood Ranch, Longboat Key, Siesta Key, University Park, and Sarasota, FL, with grace and reliability. Your Land Rover deserves nothing less than the best care, and we’re here to provide it. Don’t wait; reach out to us now for peace of mind and a smooth journey ahead.
If you’re concerned with a leak you’ve spotted under the hood, it may be related to the alternator seal. As you may know, the alternator in your BMW is a key component of the electrical system. It acts as a power generation house by converting mechanical to electrical energy to charge the battery and power other electrical systems throughout the car. This electrical powerhouse is mechanically linked to the engine through a serpentine belt.
As soon as you start your BMW, the alternator gets into action and is constantly in motion to keep the electrical systems running efficiently. It generates electricity by rotating a set of coils inside a magnetic field. The resulting electrical current from the magnetic field is what keeps your BMW’s battery charged and powers electrical components like the lights, radio, and climate control without issue. So, you want your alternator to perform at its top form.
The alternator is equipped with a rubber or plastic seal, known as the alternator seal, which prevents engine oil from seeping into the alternator. So if the alternator seal fails, oil can leak into the alternator, leading to a cascade of problems for your BMW’s engine.
Common Causes of Alternator Seal Oil Leaks
- Natural Wear and Tear: The alternator seal, like any plastic component, is subject to the effects of time and usage. The natural aging process leads to the gradual deterioration of the seal material. Cracks, brittleness, and general wear can develop over the years, making the seal less effective in preventing oil leaks. Factors such as exposure to heat and vibrations can contribute to the wear process.
- Over-tightening During Repair or Maintenance: During the installation or maintenance of the alternator, if the mounting bolts are excessively tightened, it can exert undue pressure on the alternator seal. This excess pressure can cause the seal to become compromised, leading to cracks and, eventually, oil leakage. It’s essential to adhere to the manufacturer’s torque specifications when working on your vehicle to prevent this issue.
- Harsh Operating Conditions: Environmental conditions also play a role in the deterioration of the alternator seal. Extreme temperatures, such as intense heat or freezing cold, can cause the seal material to expand and contract repeatedly, leading to wear and possible cracking. High mileage and frequent short trips can increase wear and tear as the alternator operates more often under various conditions.
- Poor Maintenance: Regular maintenance is crucial to ensuring the optimal performance of your BMW. Neglecting key maintenance tasks, such as timely oil changes, can have detrimental effects on the quality of the engine oil. Contaminated oil, laden with particles and impurities, can be abrasive and corrosive to the alternator seal, causing it to deteriorate more quickly.
Symptoms of an Oil Leak from the Alternator Seal
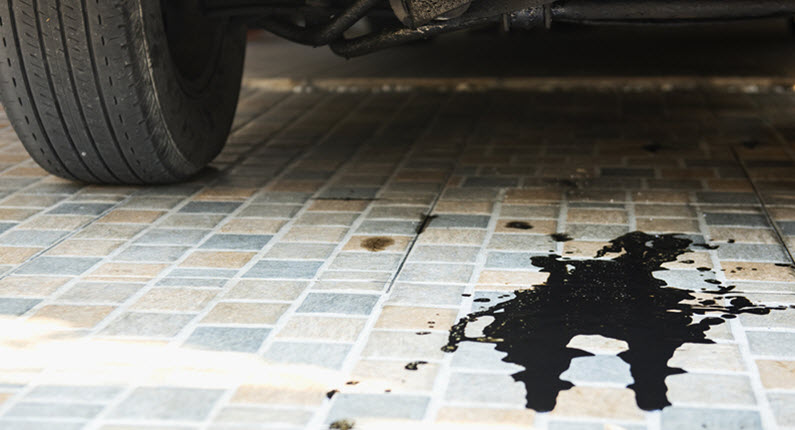
- Oil Puddles: One of the most apparent signs of an oil leak is the presence of oil puddles under your BMW when it’s parked. These puddles can vary in size and might appear near the front of the engine or underneath the alternator.
- Burning Oil Smell: As the leaking oil makes contact with hot engine components, it can create a noticeable burning oil smell. This smell can permeate both the exterior and interior of the car, signaling that there’s an issue.
- Electrical Issues: A failing alternator due to oil contamination can lead to electrical disruptions. Common electrical issues include dimmed lights (both interior and exterior), warning lights on the dashboard, and a weak or dead battery. If your battery isn’t charging correctly, it could result in difficulties starting the engine, especially in cold weather.
Sarasota’ s Most Trusted Garage for Solving BMW Alternator Seal Oil Leaks

At Encore Motorcars, we are the go-to destination for addressing oil leaks stemming from BMW’s alternator seal. We cater to customers in Bradenton, Ellenton, Nokomis, Osprey, Parrish, Venice, Lakewood Ranch, Longboat Key, Siesta Key, University Park, and Sarasota, FL. Our experienced team is well-equipped to diagnose and resolve any issues in your BMW. We take great pride in offering high-quality automotive services aimed at preserving your BMW’s impeccable condition. Reach out to us now and let us be your trusted partner in upholding your BMW’s performance and luxury standards.
5 TIPS TO AVOID OIL SLUDGE BUILDUP IN VOLKSWAGEN
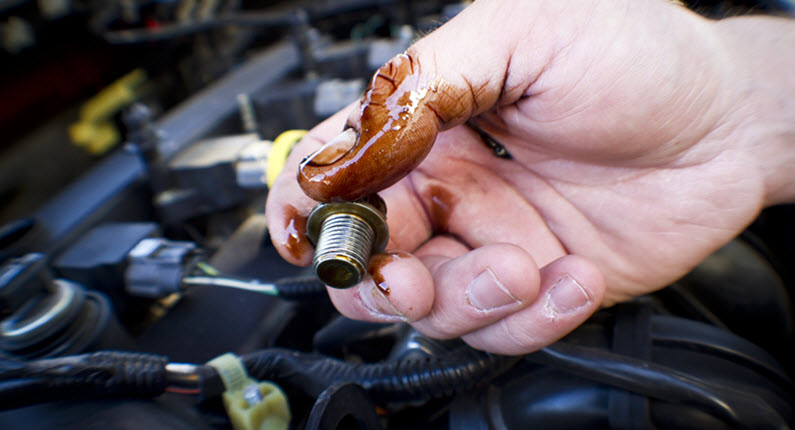
Maintaining the health and performance of your Volkswagen is crucial for a smooth driving experience. One common issue that can compromise your engine’s efficiency is oil sludge buildup. Oil sludge is a thick, gelatinous substance that forms when engine oil breaks down and mixes with contaminants. In Volkswagens, as in many other vehicles, this can lead to serious engine problems if not addressed early.
Choose the Right Oil
Selecting the appropriate engine oil is the first line of defense against oil sludge buildup. Refer to your Volkswagen owner’s manual for the manufacturer’s recommended oil specifications. Pay attention to factors such as viscosity and performance standards. Using the wrong oil can lead to accelerated sludge formation and hinder your engine’s optimal performance. High-quality synthetic oils are often recommended for their superior resistance to breakdown and better protection against sludge formation.
Get Regular Oil Changes
Frequent and timely oil changes are paramount in preventing oil sludge buildup. Over time, engine oil loses its viscosity and becomes less effective in lubricating and protecting the engine components. Follow the recommended oil change intervals specified in your owner’s manual, and consider more frequent changes if you drive in harsh conditions or engage in stop-and-go traffic regularly. Regular oil changes ensure that your engine is running with clean and effective oil, minimizing the risk of sludge formation.
Monitor Oil Levels and Quality
In addition to following a regular oil change schedule, it’s essential to monitor your oil levels and quality between changes. Check the oil dipstick regularly to ensure that the oil level is within the recommended range. Also, pay attention to the oil’s color and consistency. If you notice a dark, thick, or gritty texture, it may indicate the presence of sludge or other contaminants. Address any abnormalities promptly, as early detection can prevent further damage.
Use High-Quality Oil Filters
The role of the oil filter is to trap contaminants and debris, preventing them from circulating through the engine. Using a high-quality oil filter is crucial in maintaining the cleanliness of your engine oil. Cheap or subpar filters may not effectively capture all particles, allowing them to contribute to sludge formation. Invest in quality filters that meet or exceed the manufacturer’s specifications, and be sure to replace them at every oil change.
Take the Scenic Route to Extend Short Trip
Frequent short trips can contribute to oil sludge formation. In such situations, the engine may not reach the ideal operating temperature long enough to burn off accumulated contaminants. If possible, combine short trips into one longer journey to give your engine sufficient time to warm up and operate at peak efficiency. This practice not only helps prevent sludge buildup but also improves efficiency and reduces overall wear on the engine.
What Happens When There Is Oil Sludge
- Clogged Passages and Oil Channels: As sludge accumulates, it can clog the small passages and oil channels in the engine. This restricts the flow of oil to critical components, such as the pistons, camshaft, and bearings. Insufficient oil circulation can cause parts several problems, including engine damage.
- Poor Engine Performance: An engine affected by oil sludge may experience decreased power and efficiency. Sludge buildup can interfere with the proper functioning of various engine parts, negatively impacting combustion and overall performance.
- Increased Heat: Oil is not just a lubricant; it also helps regulate engine temperature by carrying away heat. Sludge, being a poor conductor of heat, hinders the oil’s ability to dissipate heat effectively. This can lead to increased engine temperatures, posing a risk of overheating and potential damage to critical components.
- Oil Pump Damage: The oil pump is responsible for circulating oil throughout the engine. Sludge can compromise the pump’s ability to function correctly by clogging its intake or damaging its internal components.
Come to Encore Motorcars for a Professional Oil Flush

At Encore Motorcars, we understand the importance of professional oil maintenance for your Volkswagen. Our dedicated team is proud to serve as the go-to shop for VW owners in Bradenton, Ellenton, Nokomis, Osprey, Parrish, Venice, Lakewood Ranch, Longboat Key, Siesta Key, University Park, Sarasota, FL.
With our expertise and commitment to excellence, we can help you keep your Volkswagen in optimal condition, free from the risks associated with oil sludge.
Schedule an appointment today. Let us take care of your Volkswagen’s oil maintenance needs, ensuring that you can enjoy the open road with confidence and peace of mind.
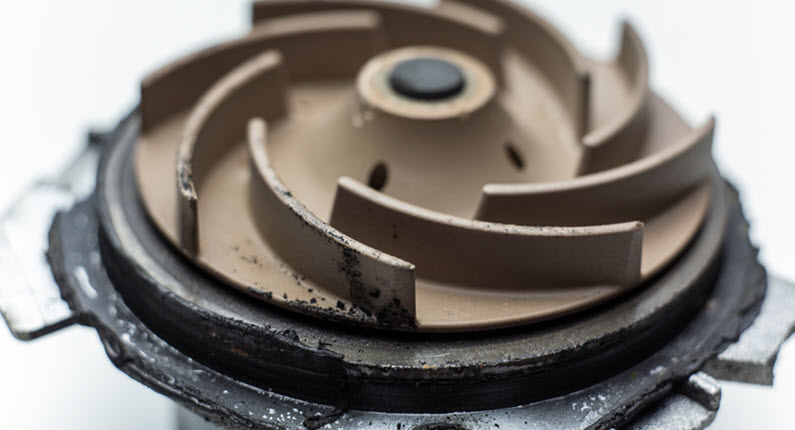
Have you ever wondered how your Jaguar’s engine manages to keep its cool even when it’s working hard to generate power? The secret lies in a small but incredibly important component called the water pump.
The water pump is your engine caretaker because it ensures that things don’t get too hot under the hood. It is responsible for making sure the engine stays at the right temperature by moving a special liquid called coolant all around. This task is crucial because engines produce a lot of heat when they burn fuel, and if this heat isn’t controlled, it can cause a range of problems, from making the engine less efficient to causing severe damage.
So, the water pump’s job is to keep the engine’s temperature just right by circulating the coolant, which absorbs heat, and then guiding it to the radiator, where it cools down before returning to the engine.
Common Reasons for Water Pump Trouble
The water pump in your Jaguar might run into problems for several reasons:
- Aging and Wear: Just like a pair of shoes, car parts can wear out over time. The mechanical parts of a water pump can degrade due to regular use, leading to reduced efficiency and eventually causing the pump to fail.
- Impeller Troubles: Inside the water pump, there’s a part called the impeller that acts like a mini fan, moving the coolant around. If this impeller gets damaged due to debris or corrosion, its ability to circulate coolant can be affected.
- Leaky Predicaments: Imagine a tiny leak in a water pipe at home – it’s a similar story with the water pump. If there’s a small leak around the pump’s seals or gasket, the coolant might escape, causing a drop in coolant levels and disrupting the cooling process.
- Neglected Care: Just as you need food and water to stay healthy, cars need proper care to stay in good shape. Skipping things like regular coolant changes and maintenance can accelerate wear and tear on the water pump.
Effects of Water Pump Failure
When the water pump in your Jaguar gives up, its effects are felt throughout the car:
- Too Hot to Handle: The most immediate consequence of a failing water pump is engine overheating. This can lead to more serious issues like warped cylinder heads, blown gaskets, and in extreme cases, even engine seizure.
- Reduced Performance: As the engine temperature rises beyond the norm, its efficiency takes a nosedive. This results in reduced power, slower acceleration, and decreased fuel efficiency.
- Cooling Issues for A/C: Interestingly, the water pump also plays a role in keeping your car’s air conditioning system If the pump isn’t working as it should, your A/C might not perform well, particularly on hot days.
- Transmission Turmoil: Overheating can have a domino effect on other car parts, including the transmission fluid. When the engine gets too hot, it can impact the transmission fluid, leading to gear problems and other transmission-related issues.
Safeguarding Your Jaguar Water Pump
Thankfully, there are steps you can take to ensure your Jaguar’s water pump functions smoothly and your engine stays happy:
- Choose Quality Coolant: When it comes to coolant, quality matters. Always use the manufacturer-recommended coolant type for your Jaguar. High-quality coolant contains the right additives to protect against corrosion and maintain optimal performance of your water pump and entire cooling system.
- Stay Attuned to Temperature Gauges: Stay observant while driving. If you notice your temperature gauge inching towards the “hot” zone, it’s a sign that your cooling system – including the water pump – might not be functioning properly.
- Routine Maintenance is Key: Regular maintenance is the cornerstone of a healthy car, and your Jaguar is no exception. Follow the manufacturer’s recommended maintenance schedule meticulously. This includes scheduled coolant changes and inspections. Ensuring that the coolant is clean, at the right levels, and has the correct mixture can significantly prolong the life of your water pump and prevent cooling system issues.
Having your Jaguar inspected by trained professionals is crucial. They can identify early signs of water pump trouble, such as leaks, corrosion, or worn components. A professional assessment can prevent minor issues from snowballing into major repair endeavors.
Expert Care for Jaguar’s Water Pump at Encore Motorcars

At Encore Motorcars, your Jaguar’s water pump concerns are in capable hands. Our expertise is recognized by drivers across Bradenton, Parrish, Ellenton, Nokomis, Osprey, Venice, Longboat Key, Lakewood Ranch, Siesta Key, University Park, and Sarasota, FL. Don’t hesitate to schedule an appointment with us for expert care and reliable solutions for your Jaguar.

Your front wheel bearing is a critical component in ensuring the smooth and safe operation of your Jaguar. While you may not be aware of this part or its important functions, it’s essential for Jaguar owners to know what to look for and address front wheel bearing failure as soon as possible to avoid consequences.
At the heart of your Jaguar’s wheel assembly lies the front wheel bearing, a seemingly small yet profoundly important component. It comprises a set of steel balls encased in a metal ring, and its role is to facilitate the smooth rotation of your wheel on the axle with minimal friction. It allows your car’s wheels to spin freely while bearing the weight of the car.
What Happens When a Jaguar Experiences Front Wheel Bearing Failure?
The failure of a front wheel bearing can lead to several undesirable consequences, making it essential to understand the potential risks as a Jaguar owner.
One of the most apparent risks is the premature wear and tear of your tires. When a front wheel bearing is compromised, it can result in uneven tire wear patterns. This not only shortens the lifespan of your tires but also necessitates more frequent replacements, adding to your maintenance costs.
An ailing front wheel bearing can severely affect your Jaguar’s handling. It may lead to instability, causing difficulties in controlling your car, especially when navigating tight turns or driving in challenging road conditions. Such handling issues can compromise your safety.
Lastly, neglecting front wheel bearing issues can lead to more extensive and expensive repairs down the road. If the problem is not addressed promptly, it may cause damage to other critical components, such as the wheel hub or spindle. This could result in costly repairs and extended downtime for your Jaguar.
Why Maintain Your Jaguar’s Front Wheel Bearing?
On the flip side, keeping your front wheel bearing in excellent condition offers a range of benefits:
- Peace of mind: Safety should be a top priority when it comes to car maintenance. A well-maintained front wheel bearing ensures proper wheel alignment and handling, reducing the risk of accidents. It offers peace of mind, knowing that your Jaguar is operating safely on the road.
- Excellent driving experience: A properly functioning front wheel bearing contributes to a smooth and comfortable ride. It minimizes vibrations and noise, enhancing your overall driving experience.
- Superior fuel efficiency: Well-maintained front wheel bearings can reduce rolling resistance. This translates to improved fuel efficiency, allowing you to travel further on a single tank of gas. Better fuel economy means savings for you and less impact on the environment.
How You Can Detect Front Wheel Bearing Issues in Your Jaguar Right Away
To address front wheel bearing issues effectively, you need to be able to detect them. Watch out for unusual sounds coming from the wheel area. These noises may include grinding, clicking, or humming sounds. If you hear any of these, it’s time to investigate further.
Periodically inspect your tires for irregular wear patterns. If you notice that one side of your tires is wearing down faster than the other, it could be a clear sign of front wheel bearing problems.
If you find that your Jaguar’s steering feels loose, imprecise, or more challenging to control, this could be a direct result of front wheel bearing issues. It’s crucial not to ignore these warning signs.
How to Fix Jaguar Front Wheel Bearing Issues Quickly and Efficiently
When you suspect or confirm front wheel bearing issues, you’ll want to address them promptly to maintain the performance and safety of your Jaguar. Your best course of action is to consult a certified Jaguar mechanic with experience in diagnosing and repairing front wheel bearing issues. They possess the necessary expertise, tools, and access to quality replacement parts.
In most cases, damaged front wheel bearings need to be replaced. A professional mechanic will know which components need replacement and will use high-quality parts to ensure long-lasting performance.
To avoid front wheel bearing issues altogether, it’s essential to incorporate regular maintenance into your car care routine. Routine inspections can identify problems at an early stage, preventing them from escalating into costly repairs. Maintenance includes cleaning, lubricating, and adjusting the bearings as necessary.
Stop Overlooking Your Jaguar’s Front Wheel Bearing

* Jaguar F-TYPE Car image credit goes to: photosvit.
The front wheel bearing of your Jaguar is an often-overlooked component that plays a crucial role in your car’s overall performance, safety, and comfort. Recognizing the risks associated with front wheel bearing failure and the benefits of proper maintenance is essential for all Jaguar owners.
Should you experience any issues or suspect problems with your front wheel bearing, don’t hesitate to contact Encore Motorcars, the leading garage in Bradenton, Ellenton, Nokomis, Osprey, Parrish, Venice, Lakewood Ranch, Longboat Key, Siesta Key, University Park, and Sarasota, FL.
Our team of dedicated mechanics is here to provide expert assistance and ensure that your Jaguar remains in peak condition.
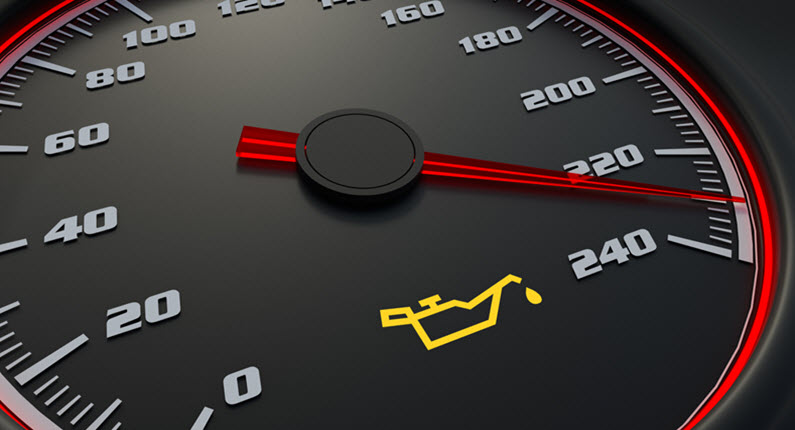
Is there anything worse than spotting a puddle of oil underneath your beloved Mini Cooper? It’s a common issue that many Mini owners face—a crank seal oil leak. Not only is it unsightly, but it can also lead to more significant engine problems if left unchecked. But fret not! In this blog post, we’ll guide you through the process of fixing a Mini crank seal oil leak and getting your ride back to its smooth and leak-free state.
Understanding the Culprit: Crank Seal Oil Leak
Before we delve into the repair process, let’s take a moment to understand the cause of this pesky issue. The crank seal, also known as the front main seal, is a small but crucial component located at the front of the engine.
Its primary purpose is to prevent engine oil from leaking out and to keep contaminants from entering the engine. Over time, due to wear and tear or poor maintenance, the crank seal can develop leaks, leading to oil escaping and causing those unsightly puddles.
DIY vs. Professional Repair: Weighing Your Options
Now that you’re aware of the problem, the big question is: Should you tackle the repair yourself or seek professional help? While some car enthusiasts might be tempted to take a DIY approach, fixing a crank seal oil leak can be quite intricate and requires specialized tools and knowledge.
If you’re not well-versed in automotive repairs, it’s best to leave this task to the professionals. This ensures that the repair is done correctly and prevents any further damage to your Mini’s engine.
The Repair Process: Trusting the Experts
When you decide to entrust the repair to professionals, you’re making a wise choice for your Mini’s longevity. An experienced mechanic will start by diagnosing the extent of the leak and determining whether the crank seal needs replacement. If a replacement is necessary, the following steps are generally involved:
Disassembly: Skillful Hands Navigate the Engine’s Puzzle
When tackling a crank seal oil leak, the repair process often begins with disassembly. A skilled mechanic will meticulously remove the necessary components to access the crank seal. This puzzle-like task might involve delicately taking out belts, pulleys, and other obstructing parts.
With years of experience under their belts, these technicians navigate the engine’s intricate layout, ensuring that each piece is safely set aside for the upcoming steps. Their expertise in disassembly sets the foundation for a successful repair.
Crank Seal Removal: Precision and Patience Ensure Success
As the repair unfolds, the next critical step is the removal of the old crank seal. This is a task that demands precision and patience. With utmost care, the mechanic delicately extracts the worn-out seal from its housing.
Every movement is calculated to avoid any unintended damage to the surrounding components. This phase of the repair showcases the mechanic’s attention to detail and their commitment to ensuring the integrity of your Mini’s engine.
Preparation and Installation: Cleanliness for a Seamless Fit
Before the new crank seal takes its place, meticulous preparation is key. The mechanic takes the time to thoroughly clean the area surrounding the crank seal housing. This step might seem minor, but it’s vital to ensure a seamless fit for the new seal.
With a clean slate, the mechanic proceeds to carefully install the new crank seal. The seal’s placement is approached with diligence, as achieving a proper fit is paramount for preventing future leaks.
Reassembly: Piecing Together Perfection
With the new crank seal snugly in place, it’s time to begin the reassembly process. Every component that was removed earlier is meticulously put back in its rightful spot. This phase requires an eye for detail and a steady hand, as the mechanic ensures that each piece is aligned precisely.
Testing: Ensuring a Seamless Fix
The culmination of the repair process brings us to the testing phase. Before declaring the job done, the mechanic performs a comprehensive check to ensure that every part of the repair has been successful. This isn’t a mere glance; it’s a thorough inspection of all the components involved in fixing the crank seal oil leak.
This meticulous testing phase serves as the final stamp of approval, confirming that your Mini Cooper is ready to hit the road without a trace of that bothersome oil leak.
Don’t Let Leaks Linger – Turn to the Experts at Encore Motorcars

When it comes to entrusting your cherished Mini Cooper to skilled hands, look no further than Encore Motorcars.
Encore Motorcars is the go-to destination for top-notch automotive services. With our team of experienced technicians and a reputation for excellence, you can rest assured that your Mini’s crank seal oil leak will be fixed with precision and care.
Don’t let a crank seal oil leak dampen your driving experience. Head over to Encore Motorcars and experience automotive excellence firsthand. Our dedication to quality repairs, exceptional customer service, and extensive expertise sets us apart as a trusted name in the industry.
Put an end to those oil puddles and ensure your Mini Cooper’s engine runs smoothly for years to come. Contact Encore Motorcars today at 941-922-6337 to schedule your appointment or visit one of our convenient locations in Bradenton, Ellenton, Nokomis, Osprey, Parrish, Venice, Lakewood Ranch, Longboat Key, Siesta Key, University Park, and Sarasota, FL. Your Mini—and your peace of mind—deserve nothing less.
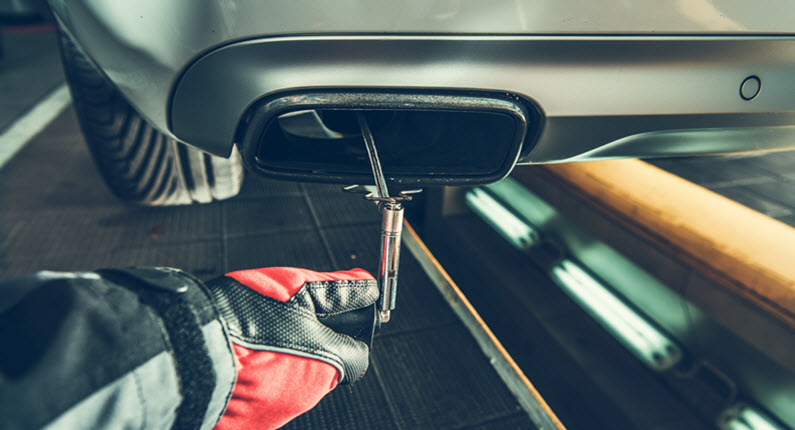
Is your Volkswagen car or SUV due for an emissions test? As conscientious drivers, we all strive to keep our cars eco-friendly, reduce our carbon footprint, and ensure that we meet the required emission standards. When it comes to passing those crucial emission tests, several factors can throw a wrench into the works. We want you to understand how to keep your Volkswagen running cleanly and efficiently while minimizing its environmental impact.
What is an emissions test failure?
Emission test failure occurs when a vehicle does not meet the established emissions standards during regulatory state testing. It indicates that the car, truck, or SUV is releasing excessive pollutants into the atmosphere, such as carbon monoxide (CO), nitrogen oxides (NOx), hydrocarbons (HC), and particulate matter.
Emission test failures are a concern for environmental reasons, as they contribute to air pollution and may pose health risks. Addressing the underlying issues through repairs and maintenance is essential to pass emissions tests and reduce environmental impact.
Why Your VW Could Fail an Emissions Test
Malfunctioning Oxygen Sensor
The oxygen sensor is a critical component in your Volkswagen emissions system. It measures the oxygen in the exhaust gases and sends this info to the engine control unit (ECU). The ECU uses data from the oxygen sensor to adjust the air-fuel mixture in real-time. If the sensor is malfunctioning or sending inaccurate data, the ECU may not optimize the fuel mixture correctly. This can lead to a rich (too much) fuel mixture, which can result in elevated emissions. The sensor can malfunction when it is old, contaminated, or damaged.
The oxygen sensor is a critical component in your Volkswagen emissions system. It measures the oxygen in the exhaust gases and sends this info to the engine control unit (ECU). The ECU uses data from the oxygen sensor to adjust the air-fuel mixture in real-time. If the sensor is malfunctioning or sending inaccurate data, the ECU may not optimize the fuel mixture correctly. This can lead to a rich (too much) fuel mixture, which can result in elevated emissions. The sensor can malfunction when it is old, contaminated, or damaged.
Catalytic Converter Issues
The catalytic converter reduces harmful exhaust gases by converting them into less harmful compounds. A faulty catalytic converter cannot perform its job effectively. It can get clogged due to carbon deposits or damaged due to overheating. This leads to increased emissions of carbon monoxide, nitrogen oxides, and hydrocarbons, which are harmful to the environment and can cause your VW to fail an emissions test.
Exhaust System Leaks
The exhaust system carries exhaust gases from the engine to the catalytic converter and then out. It must be sealed to prevent leaks. Any leaks or damage in the exhaust system can allow unburned fuel and harmful gases to escape before they reach the catalytic converter. This results in elevated emissions and can lead to a failed emission test. Exhaust system leaks can occur due to corrosion, physical damage, or poor maintenance.
Clogged Air Filter
The air filter is responsible for trapping dust and debris from the incoming air before it reaches the engine. It ensures that clean air is used in the combustion process. A clogged air filter restricts the airflow to the engine, affecting the air-fuel mixture. This disruption can lead to incomplete combustion, higher emissions of CO and HC, reduced engine performance, and decreased fuel efficiency. Air filter clogs typically result from neglecting regular maintenance. Replacing the air filter at recommended intervals is crucial to maintain engine efficiency and emissions control.
Excessive Oil Consumption
The engine oil lubricates moving parts and helps seal the combustion chamber. If the engine consumes excessive amounts of oil, it can lead to increased emissions, as oil can be burned in the combustion process. This results in elevated levels of pollutants in the exhaust gases. Excess oil consumption can be caused by worn piston rings, valve seals, or gaskets.
Evaporative Emission Control System Issues
The Evaporative Emission Control System (EVAP) is designed to prevent the release of fuel vapors into the atmosphere. It includes components like the gas cap, charcoal canister, and purge valve. Problems with the EVAP system, such as a faulty gas cap, can lead to emissions of fuel vapors into the atmosphere. This contributes to increased hydrocarbon (HC) emissions and can result in a failed emissions test. EVAP system issues can arise from damaged components, loose connections, or sensor failures.
Guaranteed Emission Test Success In Your Volkswagen

Addressing the common problems that can lead to a Volkswagen emission test failure is essential for both the environment and your car’s performance.
At Encore Motorcars, we can help to ensure that your Volkswagen runs smoothly and eco-consciously. Our expert team is dedicated to helping you overcome these challenges and ensuring that your vehicle meets emission standards.
We are located to serve VW drivers in Bradenton, Ellenton, Nokomis, Osprey, Parrish, Venice, Lakewood Ranch, Longboat Key, Siesta Key, University Park, and Sarasota, FL. Let us help you resolve your emissions-related concerns; schedule an appointment now!
Connect with us


- June 2026
- May 2026
- April 2026
- March 2026
- February 2026
- January 2026
- December 2025
- November 2025
- October 2025
- September 2025
- August 2025
- July 2025
- June 2025
- May 2025
- April 2025
- March 2025
- February 2025
- January 2025
- May 2024
- March 2024
- February 2024
- January 2024
- December 2023
- November 2023
- October 2023
- September 2023
- August 2023
- July 2023
- June 2023
- May 2023
- April 2023
- March 2023
- February 2023
- January 2023
- December 2022
- November 2022
- October 2022
- September 2022
- August 2022
- July 2022
- June 2022
- May 2022
- April 2022
- March 2022
- February 2022
- January 2022
- December 2021
- November 2021
- October 2021
- September 2021
- August 2021
- July 2021
- June 2021
- May 2021
- April 2021
- February 2021
- January 2021
- December 2020
- November 2020
- October 2020
- September 2020
- August 2020
Archives
- Acura Repair
- Aston Martin Repair
- Audi models
- Audi Repair
- Bentley Repair
- BMW Repair
- Bradenton Used Cars
- Car Maintenance
- Encore Motorcars of Sarasota
- Encore Motorcars of Sarasota Service
- Infiniti Repair
- Jaguar Repair
- Jeep models
- Land Rover models
- Land Rover Repair
- Lexus Repair
- Luxury Car Repair
- Maserati Repair
- Maybach Repair
- Mercedes Repair
- MINI Repair
- Naples Car Dealership
- Porsche Repair
- Rolls Royce Repair
- Sarasota Car Dealership
- Sarasota Car Repair
- Uncategorized
- Used Mercedes-Benz
- Volkswagen Repair